Follow the below steps to to write your first Junit 5 test case in Eclipse.
Step 1: Launch Eclipse and select your workspace.
Step 2: Open the Junit5-demo maven project that we had set up in the previous article.
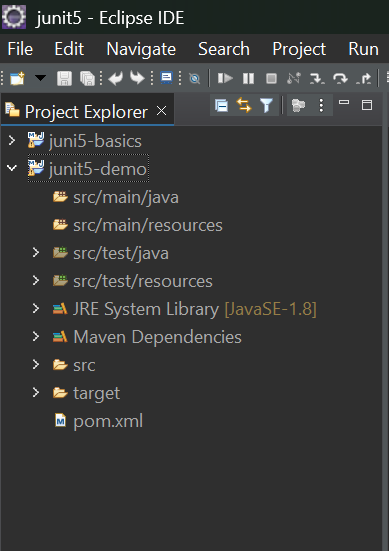
Step 3: Expand the project in the Project Explorer tab.

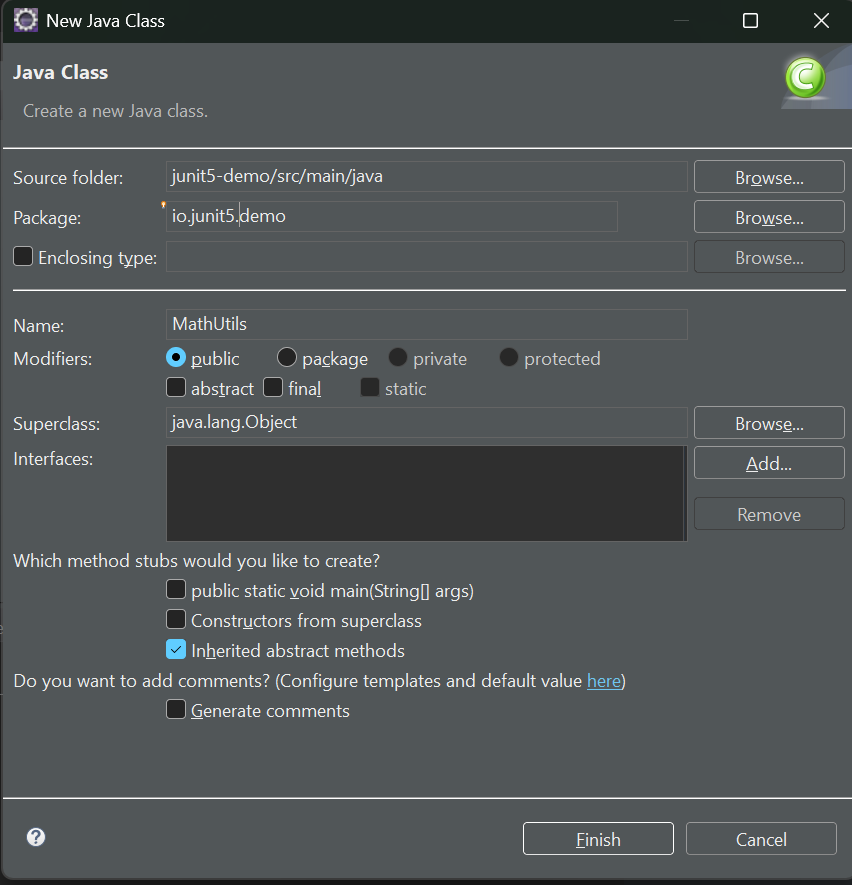
Step 4: Create a Java class in the src/main/java location that contains the main source code of your application and provide the package and the class name.

We are creating a basic class for a add method.
package io.junit5.demo;

public class MathUtils {
	public int add(int a, int b) {
	return a + b;

}
}
Now we need to create a Test case for the MathUtils class.
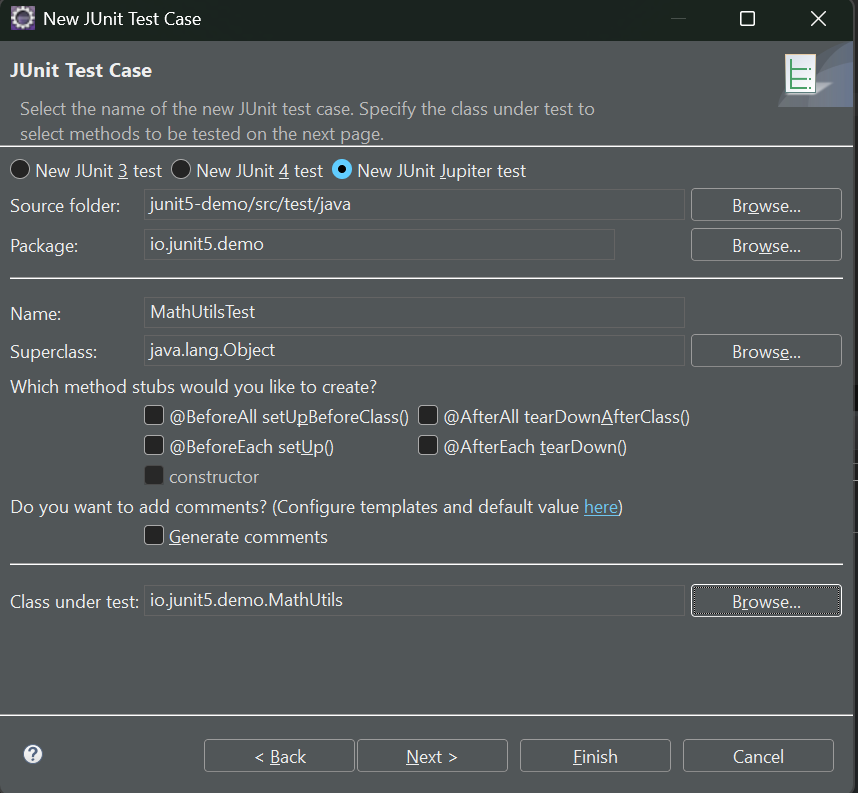
Step 5: Right-click on src/test/java > New > Other > JUnit Test Case.
Provide the package name which you provided earlier while creating the Java class also give a name for the Test class along with the Class Under Test as shown in the below screenshot.

Step 6: Click on Finish
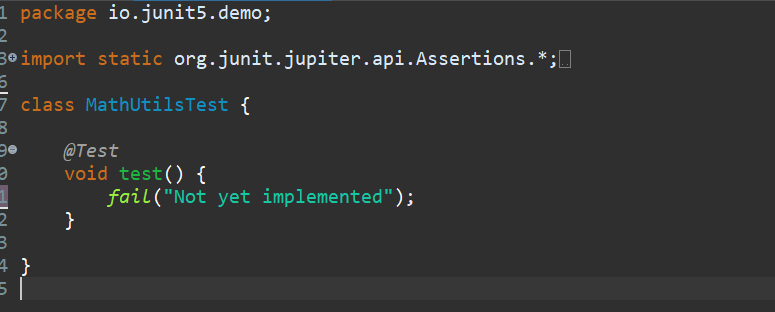
A new test class named “MathUtilsTest” will be created. It will have the following snippet of code as shown below.

It has a method “test()”. This method has an annotation as, @Test. It signifies that this is a test method in to which we write our code to test
Step 7: Right-click on editor window and run as Junit test case.
The test case fails, as shown in the figure below. It gives “AssertionFailedError: Not yet implemented.” This is because the test() method contains the ‘fail(“Not yet implemented”)’ assertion, which is designed to deliberately make the test fail, indicating that the test method hasn’t been implemented yet.

Now, let’s use assertions which are used as a validation stage to decide if a test case was successful or not. These help in comparing the code output with your desired result. We will discuss assertions in detail later in the upcoming articles. For now, you can refer to the link.
Step 8: Update the MathUtilsTest class.
package io.junit5.demo;

import static org.junit.jupiter.api.Assertions.*;

import org.junit.jupiter.api.Test;

import io.junit.MathUtils;

class MathUtilsTest {

	@Test
	void test() {
		//Creating an Instance

				MathUtils mathUtils = new MathUtils();
				int expected = 2;
				int actual = mathUtils.add(1, 1);

				assertEquals(expected, actual);
	}

}
Step 8: Right-click on the editor window and run as Junit test case and now the test case will run successfully.

With this, you have created your first JUnit Test case.
Similar Posts
Master JUnit 5: The Ultimate Guide to Java Testing