JUnit is a popular open-source testing framework for Java that allows developers to write and run tests for their Java applications. It is widely used for unit testing, which involves testing individual components or methods of an application to ensure they behave as expected. JUnit is a key tool in the Test-Driven Development (TDD) methodology, where tests are written before the actual code is implemented.
JUnit 5 which is the latest version consists of three main modules, collectively referred to as the JUnit Platform, JUnit Jupiter, and JUnit Vintage. It is more flexible and extensible than earlier versions, making it a robust choice for modern Java applications.
In short it is represented as
JUnit 5 = JUnit Platform + JUnit Jupiter + JUnit Vintage
JUnit Platform
It provides a launching mechanism for testing frameworks on the JVM. It acts as an interface between JUnit and its clients such as build tools (`Maven and Gradle`) and IDE’s (`Eclipse and IntelliJ`). It introduces the concept of a `Launcher` which external tools use to discover, filter, and execute tests.
It also provides the TestEngine API, allowing developers to create custom testing frameworks.
JUnit Jupiter
It provides the new programming and extension model for writing tests and contains a bunch of new annotations and API for writing tests and extensions.
Example annotations:
- @Test: Marks a method as a test method.
- @BeforeEach: Executes before each test.
- @AfterEach: Executes after each test.
- @BeforeAll: Executes once before all tests in the class.
- @AfterAll: Executes once after all tests in the class.
- @DisplayName: Provides a custom name for test methods.
JUnit Vintage
It ensures backward compatibility with tests written in JUnit 3 and JUnit 4 and also allows running legacy tests alongside JUnit 5 tests.
Maven Dependency for JUnit5
Open the Eclipse IDE with Java EE perspective
- Create a Maven project, select Create a Simple project and click Next.
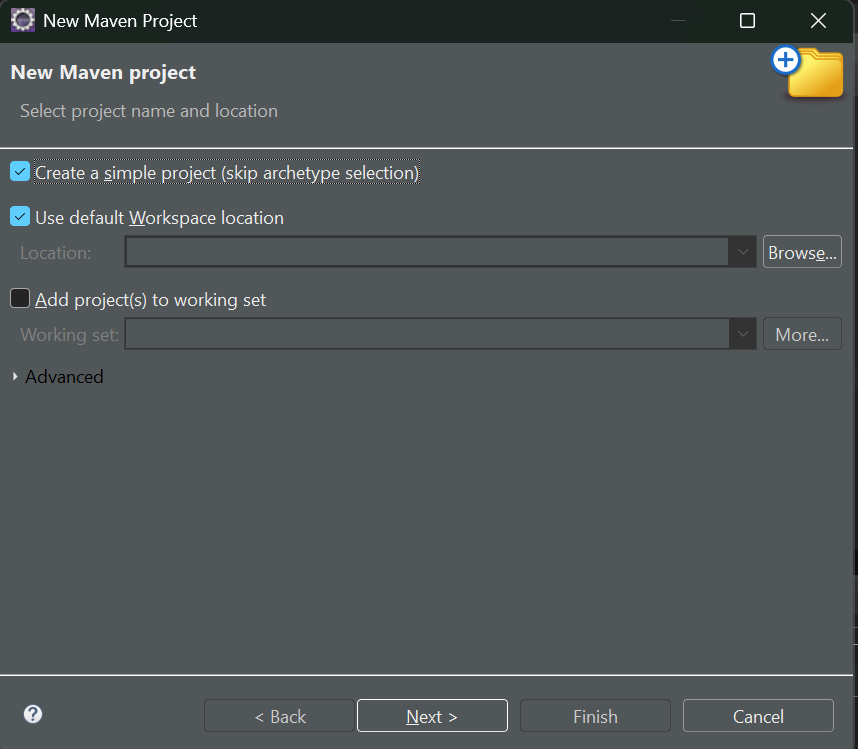
2. Provide the details as shown in the below screenshot and click on Finish.
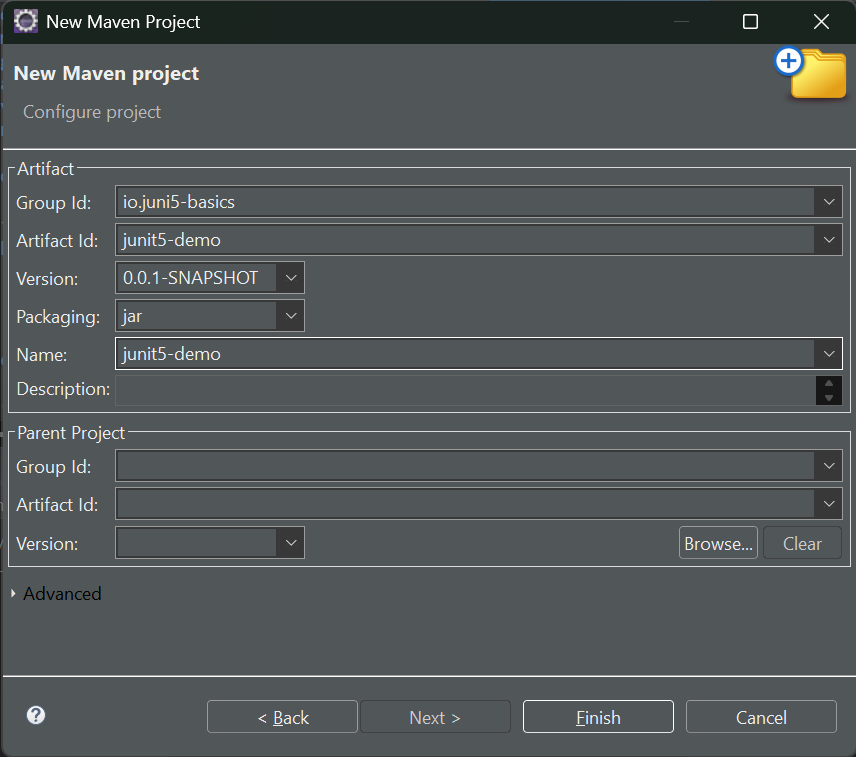
3. Expand the newly created Maven project and open the pom.xml file and add the following dependency inside the dependencies tag
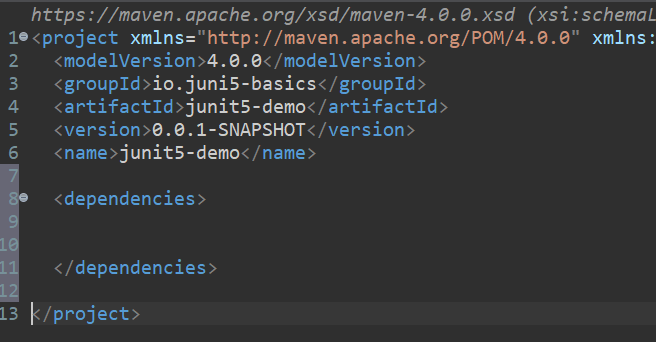
4. Now we need to add the Jupiter-API and JUnit-Jupiter-engine. In the browser search for Maven Repository and search for these two dependencies.
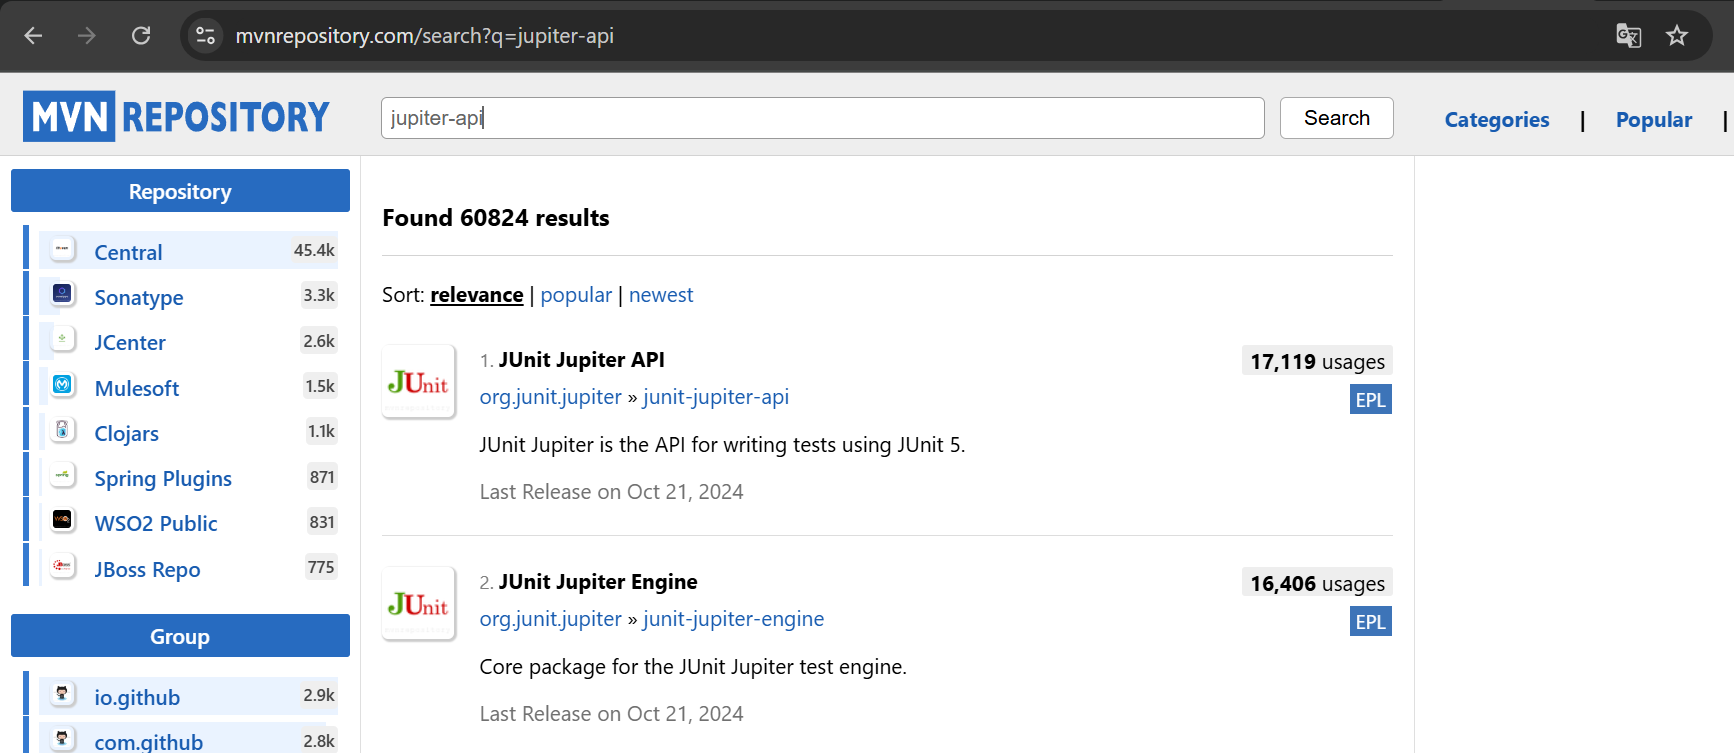
Select a specific(latest and stable) version from the list and copy the maven code.
Copy the maven code for both dependencies and paste it into your pom.xml file and shown below.
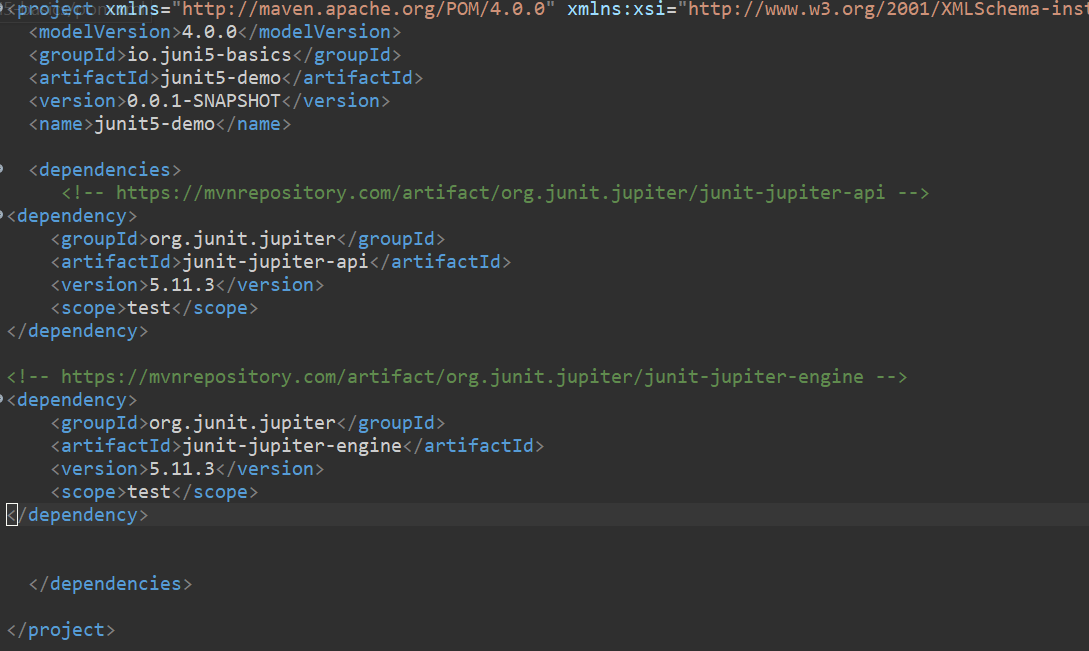
Save the pom.xml file
5. Now to download all the dependencies. Right click > Maven > Update Project>Finish.
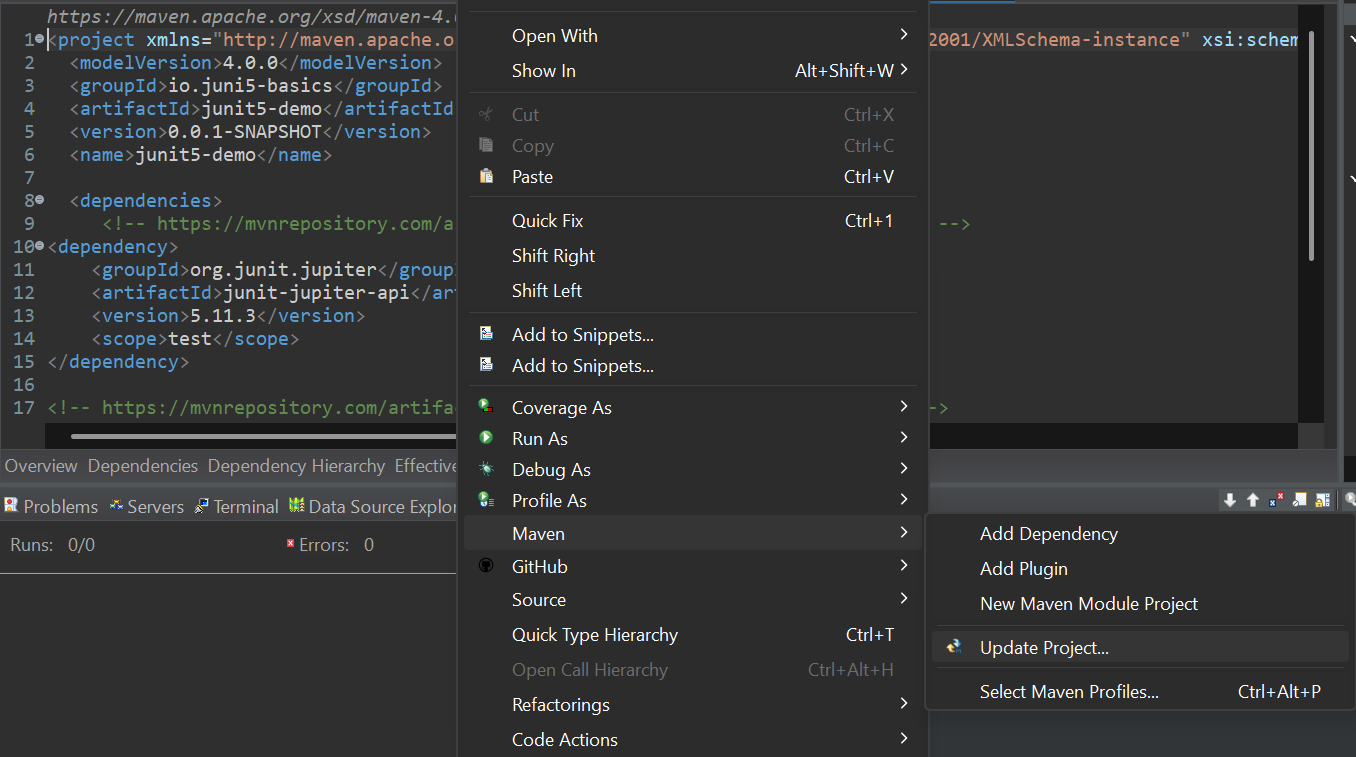
With this you are ready to create your first JUnit Test Case.