Jenkins is an open-source software package for continuous software development. It is used to automate parts of the build, testing, delivery, and deployment of applications. Jenkins is based on Java and helps with every part of the software development process.
This article will guide you through the steps for installing jenkins on rhel.
Prerequisites
- A Linux system
- A user account with sudo or root privileges
- Access to a terminal window/command line
- Java version 8/11
Step 1: Install Java
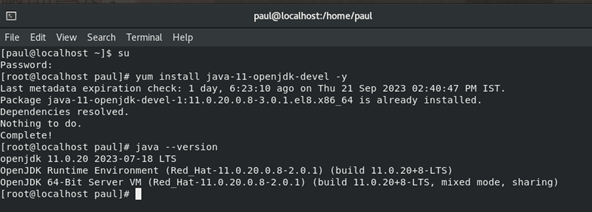
Login in as a root user
sudo su
Install Java 8 on your system.
Open a terminal window, and enter the following:
yum install java-11-openjdk-devel -y
To check the java version
java –version
Step 2: Add Jenkins Software Repository
Jenkins isn’t included in the default CentOS software repositories. To add the Jenkins repository, open a terminal window, and enter the following:
sudo wget -O /etc/yum.repos.d/jenkins.repo \https://pkg.jenkins.io/redhat-stable/jenkins.repo
Import the GPG key to ensure your software is legitimate:
rpm –import https://pkg.jenkins.io/redhat-stable/jenkins.io-2023.key
If the process is successful, the system returns a new command line without error.
Step 3: Install Jenkins on CentOS 8
To Install Jenkins on CentOS 8, enter the following in the terminal:
yum install Jenkins* -y
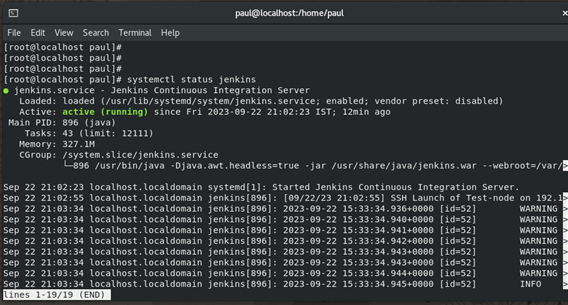
Start Jenkins Service
To start the Jenkins service and enable it at startup, enter the following:
sudo systemctl start jenkins
sudo systemctl enable jenkins
To display the status of the Jenkins service, enter the following:
sudo systemctl status jenkins
To add port 8080 in firewall
firewall-cmd –add-port=8080/tcp –permanent
To reload the firewall
firewall-cmd –reload
To list the default zone to check the port
firewall-cmd –list-all
Check the ip address of your vm
ip addr show
Step 5: Run and Set up Jenkins on CentOS 8
Next, you’ll test your system to make sure Jenkins is working correctly. Open a web browser, and enter the following URL:
Ip address:8080
The browser should display an Unlock Jenkins page. It will ask you to enter a temporary password.
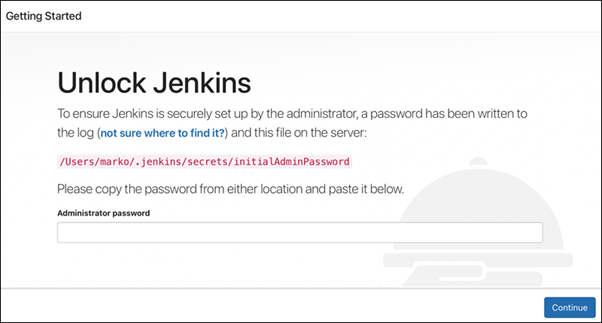
This password was created automatically during setup. To find it, switch to a terminal window and enter the following:
sudo cat /var/lib/jenkins/secrets/initialAdminPassword
The location is displayed on the Getting Started / Unlock Jenkins page.
The system will display an alphanumeric code. Copy this code and paste it into the password field. Then click Continue.
Jenkins will prompt you to install plugins. It is recommended that you Install suggested plugins. You can always change or customize plugins later.
Once plugins are configured, you’ll be prompted to Create First Admin User. Enter the values you want for your Jenkins Administrator, then click Save and Continue.
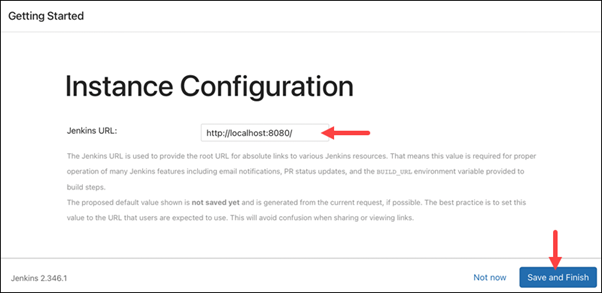
The last page will display the Instance Configuration. This shows the hostname Jenkins is configured for. This is usually the same hostname you typed into your browser to access the Getting Started page. If you do not create an admin user, there will be a warning. Click Save and Finish to start using Jenkins.
This step takes you to the Jenkins dashboard where you can create new jobs.
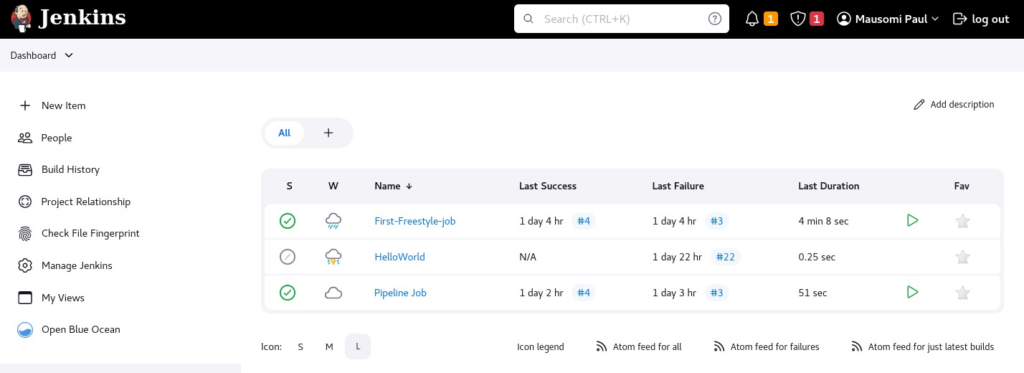
If you are configuring Jenkins for the first time, the dashboard will look different for you.
Conclusion
Congratulations!!. You have successfully installed Jenkins on RHEL / CentOS 8. Stay Connected, We will be publishing more articles on Jenkins and CI/CD.